Tuesday, October 15, 2013

Flex: XML appending

How to append a new node into a XML object in Flex/as3? Here's a simple example that teaches you how to append a XML node. Here's a guide on how to do it. But do take note that you have to use either _ or a letter for the first character of the name of the new node that you are trying to insert. However if you want to use numbers for the first character, there's a way to do it too. :P Besides for the ways that I have listed in this post, you can use dot notation (.) to append a new node too. :)

Source Code for the main application - 'SimpleXMLManipulation.mxml'
<?xml version="1.0" encoding="utf-8"?>
<s:Application xmlns:fx="http://ns.adobe.com/mxml/2009" 
      xmlns:s="library://ns.adobe.com/flex/spark" 
      xmlns:mx="library://ns.adobe.com/flex/mx" 
      creationComplete="creationCompleteEvt(event)" 
      xmlns:local="*">
 <fx:Declarations>
  <local:SimpleXMLConverter id="converter"/>
 </fx:Declarations>
 <fx:Script>
  <![CDATA[
   import mx.events.FlexEvent;
   
   protected function creationCompleteEvt(e:FlexEvent):void
   {
    converter.init();
   }
  ]]>
 </fx:Script>
 <s:VGroup width="100%" 
     height="100%" 
     verticalAlign="middle" 
     horizontalAlign="center">
  <s:Label text="Original XML"/>
  <s:TextArea text="@{converter.simpleXML}"/>
  <s:Spacer height="10"/>
  <s:HGroup>
   <s:VGroup horizontalAlign="center">
    <s:Label text="Modified XML using appendChild()"/>
    <s:TextArea text="{converter.simpleXML1}" 
       editable="false"
        width="30%" 
       minWidth="300"/>  
   </s:VGroup>
   <s:VGroup horizontalAlign="center">
    <s:Label text="Modified XML using []"/>
    <s:TextArea text="{converter.simpleXML2}"
       editable="false"
       width="30%" 
       minWidth="300"/>   
   </s:VGroup>
  </s:HGroup>
 </s:VGroup>
</s:Application>

Source code for the XML manipulating class
package
{
 import flash.events.Event;
 import flash.events.EventDispatcher;
 
 [Bindable]
 public class SimpleXMLConverter extends EventDispatcher
 {
  //XML String
  private var simpleXMLString:String = "" +
   "";
  
  //XML that contains the above simpleXMLString
  private var _simpleXML:XML;
  
  [Bindable(event="simpleXMLChanged")]
  public function get simpleXML():String
  {
   return _simpleXML;
  }

  public function set simpleXML(value:String):void
  {
   //If the input value isn't a valid XML,
   //we will set it to empty.
   try
   {
    _simpleXML = XML(value);
   }catch(e:Error)
   {
    _simpleXML = new XML();
   }
   
   //Modified XML using appendChild()
   simpleXML1 = XML(_simpleXML.toXMLString());
   if(simpleXML1)
   {
    var dummyXMLNode:XML;
    var dummyXMLNodeStr:String;
    dummyXMLNodeStr = "<" + name1Str + name2Str + ">";
    dummyXMLNodeStr += valueStr;
    dummyXMLNodeStr += "";
    dummyXMLNode = new XML(dummyXMLNodeStr);
    simpleXML1.appendChild(dummyXMLNode);
    if(simpleXML1.level1.length() > 0)
    {
     for(var i:int = 0; i < simpleXML1.level1.length(); i ++)
     {
      simpleXML1.level1[i].appendChild(dummyXMLNode);
     }
    }
   }
   
   //Modified XML using []
   simpleXML2 = XML(_simpleXML.toXMLString());
   if(simpleXML2)
   {
    simpleXML2[name1Str + name2Str] = 
     valueStr;
    if(simpleXML2.level1.length() > 0)
    {
     for(i = 0; i < simpleXML2.level1.length(); i ++)
     {
      simpleXML2.level1[i][name1Str + name2Str] = 
       valueStr;
     }
    }
   }
   
   //dispatching the 8 event to update the
   //respective text area
   dispatchEvent(new Event("simpleXML1Changed", 
    true, true));
   dispatchEvent(new Event("simpleXML2Changed", 
    true, true));
  }
  
  //XML that contains the modified XML based
  //on the above simpleXMLString and appendChild()
  private var _simpleXML1:XML;

  public function get simpleXML1():XML
  {
   return _simpleXML1;
  }

  [Bindable(event="simpleXML1Changed")]
  public function set simpleXML1(value:XML):void
  {
   _simpleXML1 = value;
  }
  
  //XML that contains the modified XML based
  //on the above simpleXMLString and []
  private var _simpleXML2:XML;

  public function get simpleXML2():XML
  {
   return _simpleXML2;
  }
  
  [Bindable(event="simpleXML2Changed")]
  public function set simpleXML2(value:XML):void
  {
   _simpleXML2 = value;
  }
  
  //The name of the empty node - part1
  private var name1Str:String = "empty";
  //The name of the empty node - part2
  private var name2Str:String = "node";
  
  //The value of the empty node
  private var valueStr:String = "dummyValue";
  
  public function init():void
  {
   simpleXML = new XML(simpleXMLString);
   
   //dispatching the event to update the main
   //respective text area
   dispatchEvent(new Event("simpleXMLChanged", 
    true, true));
  }
 }
}
* Click here for the demo shown in this post.
^ Click here for the source files for the demo.

Saturday, October 5, 2013

Flex 4: Disabling a Button Bar Button...

I was trying to disable one of the buttons that belongs to a 'Button Bar' component that comes with Flex 4. After spending a bit of time debugging and googling, I finally managed to come out with a decent solution to it...

Source Code for the main application - 'SimpleButtonBarEnabling.mxml'
<?xml version="1.0" encoding="utf-8"?>
<s:Application xmlns:fx="http://ns.adobe.com/mxml/2009" 
      xmlns:s="library://ns.adobe.com/flex/spark" 
      xmlns:mx="library://ns.adobe.com/flex/mx" 
      creationComplete="creationCompleteEvent(event)">
 <fx:Script>
  <![CDATA[
   import mx.events.FlexEvent;
   
   protected function creationCompleteEvent(event:FlexEvent):void
   {
    //We are disabling the 4th button.
    otherInfo.enabled = false;
   }
   
  ]]>
 </fx:Script>
 <s:VGroup width="100%" 
     height="100%"
     verticalAlign="middle" 
     horizontalAlign="center" 
     gap="0">
  <!-- Create a Spark ButtonBar control to navigate 
   the ViewStack container. -->
  <s:ButtonBar dataProvider="{myViewStack}" 
      skinClass="CustomButtonBarSkin"/>
  
  <!-- Define the ViewStack and the three 
   child containers. -->
  <mx:ViewStack id="myViewStack" 
       borderStyle="solid" 
       width="50%"
       paddingBottom="10"
       paddingTop="10"
       paddingLeft="10"
       paddingRight="10">  
   <s:NavigatorContent id="search" 
       label="Search">
    <s:Label text="Search Screen"/>
   </s:NavigatorContent>
  
   <!-- set enabled="false" to disable the button -->
   <s:NavigatorContent id="custInfo" 
       label="Customer Info" 
       enabled="false">
    <s:Label text="Customer Info"/>
   </s:NavigatorContent>
  
   <s:NavigatorContent id="accountInfo" 
       label="Account Info">
    <s:Label text="Account Info"/>
   </s:NavigatorContent>
   
   <s:NavigatorContent id="otherInfo" 
        label="Others">
    <s:Label text="Others"/>
   </s:NavigatorContent>
  </mx:ViewStack>  
 </s:VGroup>
</s:Application>
And here's the custom skin class for the 'Button Bar' component.
<?xml version="1.0" encoding="utf-8"?>

<!--

    ADOBE SYSTEMS INCORPORATED
    Copyright 2008 Adobe Systems Incorporated
    All Rights Reserved.

    NOTICE: Adobe permits you to use, modify, and distribute this file
    in accordance with the terms of the license agreement accompanying it.

-->

<!--- The default skin class for the Spark ButtonBar component. The buttons on the ButtonBar component
    use the ButtonBarLastButtonSkin, ButtonBarFirstButtonSkin and ButtonBarMiddleButtonSkin classes.  
    
      @see spark.components.ButtonBar
      @see spark.components.ButtonBarButton    
        
      @langversion 3.0
      @playerversion Flash 10
      @playerversion AIR 1.5
      @productversion Flex 4
-->
<s:Skin xmlns:fx="http://ns.adobe.com/mxml/2009" xmlns:s="library://ns.adobe.com/flex/spark" 
        alpha.disabled="0.5">

    <fx:Metadata>
    <![CDATA[ 
       /** 
         * @copy spark.skins.spark.ApplicationSkin#hostComponent
         */
        [HostComponent("spark.components.ButtonBar")]
    ]]>
    </fx:Metadata> 

    <s:states>
        <s:State name="normal" />
        <s:State name="disabled" />
    </s:states>
    
    <fx:Declarations>

  <!--- Have removed the first and third button since it's not needed.  -->
  
        <!--- 
            @copy spark.components.ButtonBar#middleButton
            @default spark.skins.spark.ButtonBarMiddleButtonSkin
            @see spark.skins.spark.ButtonBarMiddleButtonSkin
  
   The middle Button will be used as the item renderer for all the
   buttons of this button bar. And we are enabling the buttons
   base on the data passed into this component.
        -->
        <fx:Component id="middleButton" >
            <s:ButtonBarButton enabled="{data.enabled}"/>
        </fx:Component>

    </fx:Declarations>

    <!--- @copy spark.components.SkinnableDataContainer#dataGroup -->
    <s:DataGroup id="dataGroup" width="100%" height="100%">
        <s:layout>
            <s:ButtonBarHorizontalLayout gap="-1"/>
        </s:layout>
    </s:DataGroup>

</s:Skin>
* Click here for the demo shown in this post.
^ Click here for the source files for the demo.

Friday, October 4, 2013

Renaming your recursive files and folder using a batch file.

Initially I was using a 3rd party software to do all the renaming work. But as I proceed, I ended up searching high and low for a method using a batch file (*.bat) to do all the tedious work. Therefore, after playing and modifying the code, I have ended up with this.

@echo off
setlocal enabledelayedexpansion
REM for renaming of recursive folders, sub folders
for /d /r %%f in (*.*) do (
set fn=%%~nxf

REM replace all the . with __ in the folder names (excludes extensions)
if not [!fn!]==[] ( 
if not ["%%~nxf"]==["!fn:.=__!"] ( 
echo ren "%%~f" "!fn:.=__!" 
ren "%%~f" "!fn:.=__!" 
)
)
REM replace all the -interface with nothing in the folder names
REM (excludes extensions) add a I in front of the folder name
if not [!fn!]==[] ( 
if not ["%%~nxf"]==["!fn:-interface=!"] ( 
echo ren "%%~f" "I!fn:-interface=!" 
ren "%%~f" "I!fn:-interface=!" 
)
)
)

REM for renaming of recursive files
for /r %%f in (*.*) do (
set fn=%%~nf

REM replace all the - with __ in the file names (excludes extensions)
if not [!fn!]==[] ( 
if not ["%%~nxf"]==["!fn:-=__!%%~xf"] ( 
echo ren "%%~f" "!fn:-=__!%%~xf" 
ren "%%~f" "!fn:-=__!%%~xf" 
)
)
REM replace all the -interface with nothing in the file names
REM (excludes extensions) add a I in front of the file name
if not [!fn!]==[] ( 
if not ["%%~nxf"]==["!fn:-interface=!%%~xf"] ( 
echo ren "%%~f" "I!fn:-interface=!%%~xf" 
ren "%%~f" "I!fn:-interface=!%%~xf" 
)
)
)
pause

* Click here to download the batch file that I have listed in this posted.
^ Click here to find out more about batch files in Windows.
~ Click here to find out the difference between %% and !! in a batch file.

Thursday, September 26, 2013

Windows: Create a automated action...

Not all software out there allows you to save a series of commands/actions and allows you to run them again without the need of opening the software. Even if it can allow you to do that using command prompt, not all the functionalities will not be provided to you. Luckily there are software like...

'AutoHotkey'
You can script the actions that you would like to perform in a particular
software. On top of that, you can generate the script into a normal
windows executable(.exe) file that allows you to share it with normal
Windows User.

However, I knew that there are numerous software out there that can provide
you with a GUI interface and record all the necessary steps that you would
like to perform over and over again. Ex: winautomation, Do It Again,
RoboTask, etc... But most of them requires a license, and since I'm
performing a easy task, therefore I would rather spend a bit of time
scripting the actions rather than paying for a license.

* Click here to find out more about 'AutoHotkey'.

Thursday, September 19, 2013

Flex 4: Using Ant to create a smaller file size like bin-release

I was trying to create an automation script for some of the projects in Adobe Flex 4 the other day and I realised that the ant build is generating a far more bigger swf file (in terms of the file size)than the ones created using bin-release. After numerous attempts, I finally managed to compress the file size to match the ones that that were generated using bin-release.

<!-- Within the <mxmlc> tag of your ant script, you need to 
 add the following. And take note of the comments below -->
<mxmlc>
 <static-link-runtime-shared-libraries>false</static-link-runtime-shared-libraries>

 <runtime-shared-library-path path-element="${FLEX_HOME}/frameworks/libs/textLayout.swc">
  <!-- If you are copying and pasting, do take note that 
   'textLayout_1.0.0.595.swz' isn't in the 'flex/' folder 
   but the 'tlf/' folder under 
   'http://fpdownload.adobe.com/pub/swz/' -->
  <url rsl-url="http://fpdownload.adobe.com/pub/swz/tlf/1.0.0.595/textLayout_1.0.0.595.swz" 
   policy-file-url="http://fpdownload.adobe.com/pub/swz/crossdomain.xml"/>
  <url rsl-url="textLayout_1.0.0.595.swz" policy-file-url="" />
 </runtime-shared-library-path>

 <!-- If you are copying and pasting, do take note that 
  'framework.swc' needs to be included before the other 'swz' 
  that belongs to the same 'flex/' folder under 
  'http://fpdownload.adobe.com/pub/swz/', otherwise errors
  will occur when you run the web application. -->
    <runtime-shared-library-path path-element="${FLEX_HOME}/frameworks/libs/framework.swc">
        <url rsl-url="http://fpdownload.adobe.com/pub/swz/flex/4.5.0.20967/framework_4.5.0.20967.swz" 
   policy-file-url="http://fpdownload.adobe.com/pub/swz/crossdomain.xml"/>
        <url rsl-url="framework_4.0.0.14159.swz" policy-file-url="" />
    </runtime-shared-library-path>

    <runtime-shared-library-path path-element="${FLEX_HOME}/frameworks/libs/spark.swc">
  <url rsl-url="http://fpdownload.adobe.com/pub/swz/flex/4.5.0.20967/spark_4.5.0.20967.swz" 
   policy-file-url="http://fpdownload.adobe.com/pub/swz/crossdomain.xml"/>
  <url rsl-url="spark_4.0.0.14159.swz" policy-file-url="" />
 </runtime-shared-library-path>

 <runtime-shared-library-path path-element="${FLEX_HOME}/frameworks/libs/sparkskins.swc">
  <url rsl-url="http://fpdownload.adobe.com/pub/swz/flex/4.5.0.20967/sparkskins_4.5.0.20967.swz" 
   policy-file-url="http://fpdownload.adobe.com/pub/swz/crossdomain.xml"/>
  <url rsl-url="sparkskins_4.0.0.14159.swz" policy-file-url="" />
 </runtime-shared-library-path>

 <runtime-shared-library-path path-element="${FLEX_HOME}/frameworks/libs/rpc.swc">
  <url rsl-url="http://fpdownload.adobe.com/pub/swz/flex/4.5.0.20967/rpc_4.5.0.20967.swz" 
   policy-file-url="http://fpdownload.adobe.com/pub/swz/crossdomain.xml"/>
  <url rsl-url="rpc_4.0.0.14159.swz" policy-file-url="" />
 </runtime-shared-library-path>

 <runtime-shared-library-path path-element="${FLEX_HOME}/frameworks/libs/charts.swc">
  <url rsl-url="http://fpdownload.adobe.com/pub/swz/flex/4.5.0.20967/charts_4.5.0.20967.swz" 
   policy-file-url="http://fpdownload.adobe.com/pub/swz/crossdomain.xml"/>
  <url rsl-url="charts_4.5.0.20967.swz" policy-file-url="" />
 </runtime-shared-library-path>

 <!-- If you are copying and pasting, do take note that 'mx.swc'
  isn't in the 'libs/' folder but the 'libs/mx/' folder under 
  '${FLEX_HOME}/frameworks/libs/'  -->
 <runtime-shared-library-path path-element="${FLEX_HOME}/frameworks/libs/mx/mx.swc">
  <url rsl-url="http://fpdownload.adobe.com/pub/swz/flex/4.5.0.20967/mx_4.5.0.20967.swz" 
   policy-file-url="http://fpdownload.adobe.com/pub/swz/crossdomain.xml"/>
  <url rsl-url="mx_4.5.0.20967.swz" policy-file-url="" />
 </runtime-shared-library-path>
</mxmlc>
* Click here for a great guide on creating the ant automation file for your flex 4 project.

Friday, September 13, 2013

Flex: Scrolling to a particular row of data of a Datagrid

I was looking for a much more easier way of scrolling to a particular row of data that belongs to the dataGrid. And I managed to find this.

Source Code for the main application - 'SimpleDataGridScrolling.mxml'
<?xml version="1.0" encoding="utf-8"?>
<s:Application xmlns:fx="http://ns.adobe.com/mxml/2009" 
      xmlns:s="library://ns.adobe.com/flex/spark" 
      xmlns:mx="library://ns.adobe.com/flex/mx" >
 <fx:Declarations>
  <fx:XMLList id="records">
   <record>
    <id>01</id>
    <name>Eric</name>
    <address>3987 Mauris Rd.</address>
   </record>
   <record>
    <id>02</id>
    <name>Bradley</name>
    <address>692-535 Id Street</address>
   </record>
   <record>
    <id>03</id>
    <name>Flynn</name>
    <address>191-491 Ullamcorper Road</address>
   </record>
   <record>
    <id>04</id>
    <name>Akeem</name>
    <address>400-2992 Donec Rd.</address>
   </record>
   <record>
    <id>05</id>
    <name>Shad</name>
    <address>P.O. Box 490, 9377 Lorem, Avenue</address>
   </record>
   <record>
    <id>06</id>
    <name>Brady</name>
    <address>P.O. Box 203, 418 Amet Street</address>
   </record>
   <record>
    <id>07</id>
    <name>Igor</name>
    <address>5584 Ultrices Av.</address>
   </record>
   <record>
    <id>08</id>
    <name>Herman</name>
    <address>Ap #316-3329 Fermentum Avenue</address>
   </record>
   <record>
    <id>09</id>
    <name>Martin</name>
    <address>932-8151 Arcu. Road</address>
   </record>
   <record>
    <id>10</id>
    <name>Micah</name>
    <address>P.O. Box 244, 8472 Lacus. Ave</address>
   </record>
   <record>
    <id>11</id>
    <name>Isaiah</name>
    <address>3798 Risus. Avenue</address>
   </record>
   <record>
    <id>12</id>
    <name>Amos</name>
    <address>Ap #377-2082 Mollis. Road</address>
   </record>
   <record>
    <id>13</id>
    <name>Dominic</name>
    <address>P.O. Box 801, 2289 Malesuada Rd.</address>
   </record>
   <record>
    <id>14</id>
    <name>Ethan</name>
    <address>Ap #509-2519 Non, Avenue</address>
   </record>
   <record>
    <id>15</id>
    <name>Julian</name>
    <address>9373 Ut Avenue</address>
   </record>
   <record>
    <id>16</id>
    <name>Yoshio</name>
    <address>120-7486 Ornare, Av.</address>
   </record>
   <record>
    <id>17</id>
    <name>Harlan</name>
    <address>Ap #821-3336 Velit. Av.</address>
   </record>
   <record>
    <id>18</id>
    <name>Rigel</name>
    <address>Ap #689-7263 Consectetuer Rd.</address>
   </record>
   <record>
    <id>19</id>
    <name>Holmes</name>
    <address>Ap #790-6923 Tincidunt St.</address>
   </record>
   <record>
    <id>20</id>
    <name>Aidan</name>
    <address>948-115 Imperdiet Street</address>
   </record>
   <record>
    <id>21</id>
    <name>Colin</name>
    <address>P.O. Box 454, 9501 Lectus Avenue</address>
   </record>
   <record>
    <id>22</id>
    <name>Palmer</name>
    <address>Ap #402-1566 Varius Road</address>
   </record>
   <record>
    <id>23</id>
    <name>Sylvester</name>
    <address>852-8076 Enim. St.</address>
   </record>
   <record>
    <id>24</id>
    <name>Cole</name>
    <address>876-4551 Ornare Ave</address>
   </record>
   <record>
    <id>25</id>
    <name>Yardley</name>
    <address>P.O. Box 256, 4107 Tempor Rd.</address>
   </record>
   <record>
    <id>26</id>
    <name>Coby</name>
    <address>P.O. Box 467, 7273 Nulla Street</address>
   </record>
   <record>
    <id>27</id>
    <name>Beau</name>
    <address>743-8871 Sem Rd.</address>
   </record>
   <record>
    <id>28</id>
    <name>Kermit</name>
    <address>Ap #183-8772 Magna. St.</address>
   </record>
   <record>
    <id>29</id>
    <name>Josiah</name>
    <address>P.O. Box 645, 453 Ornare, St.</address>
   </record>
   <record>
    <id>30</id>
    <name>Elijah</name>
    <address>537 Turpis Avenue</address>
   </record>
  </fx:XMLList>
  <s:XMLListCollection id="tempXmlCollection" 
        source="{records}"/>
  <s:XMLListCollection id="tempXmlCollection1" 
        source="{records.id}"/>
 </fx:Declarations>
 <fx:Script>
  <![CDATA[
   import mx.events.FlexEvent;
   
   import spark.components.List;
   import spark.events.IndexChangeEvent;
   
   /**
    * Upon changing the selection of the drop down menu,
    * we would need to loop through the data of the
    * datagrid and find the one that matches the 
    * selection from the drop down menu and we would
    * select the row and scroll to that row.
    */
   protected function changeHandler(event:IndexChangeEvent):void
   {
    var tempData:Object = ddId.selectedItem;
    var tempDP:XMLListCollection = 
     gridData.dataProvider as XMLListCollection;
    for(var i:int = 0; i < tempDP.length; i ++)
    {
     if(tempDP.getItemAt(i).id == tempData)
     {
      gridData.selectedIndex = i;
      //This works in Flex 4 Spark Components.
      gridData.grid.verticalScrollPosition = 
       gridData.grid.getCellY(i, 0);
      //This works in Flex 3 Components but not 
      //for Spark Components.
      //gridData.scrollToIndex(i);
      break;
     }
    }
   }
   
  ]]>
 </fx:Script>
 <s:VGroup verticalAlign="middle" 
     horizontalAlign="center" 
     width="100%" 
     height="100%">
  <s:HGroup verticalAlign="middle" 
      horizontalAlign="center" >
   <s:Label text="Select a ID:"/>
   <s:DropDownList id="ddId"
       dataProvider="{tempXmlCollection1}"
       change="changeHandler(event)"/>
  </s:HGroup>
  <s:DataGrid id="gridData" 
     height="200"
      width="500"
     resizableColumns="true"
     dataProvider="{tempXmlCollection}">
   <s:columns>
    <s:ArrayList>
     <s:GridColumn dataField="id" 
          minWidth="50"
          headerText="ID"/>
     <s:GridColumn dataField="name" 
          minWidth="150"
          headerText="Name"/>
     <s:GridColumn dataField="address"  
          minWidth="280" 
          headerText="Address"/>
    </s:ArrayList>
   </s:columns>
  </s:DataGrid>
 </s:VGroup>
</s:Application>
* Click here for the demo shown in this post.
^ Click here for the source files for the demo.

Sunday, September 8, 2013

Kaomoji

Have you used the Japanese Kaomoji(face characters) before? Do you like it? However, if you are going to copy and paste each and every one of them, that's going to be pretty troublesome. But, if you have a Windows PC, you can actually configure it and it is definitely much more faster than the usual Copy and Pasting method. (You can also apply it to a Mac PC, but I don't own one now.)

1) First of all, you will have to download the file over here.

2) You will have to change to the 「Microsoft Japanese IME」 keyboard.

3) Click on the triangular button, follow by the step
of clicking on the 「Show the Language bar」 button.

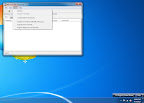
4) After that, click on the 「Tools」 button, follow by
the step of clicking on the「Dictionary Tool」 button.

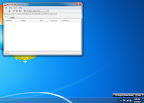
5) This will open up the 「Microsoft IME Dictionary Tool」 software.

6) Click on the 「Tool」 button, follow by the step
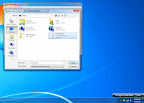
of clicking on the 「Import from Text File...」 button.

7) Select the file,「kaomoji.txt」, that you have downloaded earlier.

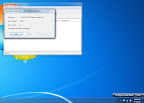
8) Click on the 「Exit」 button, after all the data have been imported successfully.

Congratulations!!!
You have imported all the data successfully.
From today onwards, while typing the Japanese characters 「いい」(Good) using
the 「Microsoft Japanese IME」 keyboard, all sorts of Japanese Kaomoji(face
characters) options will be given to you too. Isn't that great? :D